Tuesday, December 30, 2008

Roasted Fall Vegetables in Chedder Crust

I received two beautiful new tart pans from my parents for Christmas from Sur la Table, one square and one rectanlge. I decided to try this recipe from Eating Well magazine, which is actually a savory tart rather than a sweet one. It was very easy and quick. For those of you that love goat cheese, this recipe is definitely for you.

There were a few minor technical difficulties along the way (the electricity went out for about an hour while the tart was in the oven), but the tart turned out really well. The cheddar crust is crumbly and satisfying. The tart served as our main course and we all left the table feeling full.

While I made the crust in a food processor, it should work just as well by hand. You can use two knifes or a fork to cut the butter into the other ingredients until you reach a good consistency. I have made a few minor changes to a couple of ingredients. This recipe can be altered to suit your tastes by changing the vegetables used or substituting a pesto or sundried tomato spread for the olive tapenade. You can also substitute feta cheese for the goat cheese.

Filling:
2 leeks, white and light green parts only, coarsely chopped and rinsed
1 pound small broccoli florets, trimmed and cut in half
2 small or 1 large fennel bulb, cored and thinly sliced lengthwise
1 thinly sliced red onion
1 head garlic
1 tablespoon chopped fresh rosemary or 1 teaspoon dried
1/2 teaspoon salt
1/4 teaspoon freshly ground pepper
2 tablespoons extra-virgin olive oil
1 tablespoon sherry vinegar
1/3 cup black olive tapenade
1/2 cup crumbled goat cheese

Crust:
1 1/4 cups All-Purpose flour
1 cup shredded reduced-fat Cheddar cheese
1/2 cup cornmeal
4 tablespoons cold unsalted butter, cut into small pieces
3 tablespoons extra-virgin olive oil
3 tablespoons ice water

1. Preheat oven to 400°F.
2. To prepare filling: Spread leeks, broccoli (or Brussels sprouts), fennel and onion in a single layer on a large rimmed baking sheet along with the unpeeled head of garlic. Season the vegetables with rosemary, salt and pepper. Drizzle oil over the vegetables and garlic and toss to coat.
3. Bake, stirring occasionally, until the vegetables are tender when pierced with a knife and the garlic is soft, 35 to 45 minutes. Remove from the oven, set aside the garlic, and toss the vegetables with vinegar. Let cool.
4. To prepare crust: Coat an 8-by-12-inch rectangular or 11-inch round removable-bottom tart pan with cooking spray.
5. Place flour, Cheddar and cornmeal in a food processor; pulse to combine. Add butter one piece at a time, pulsing once or twice after each addition, until incorporated. Add oil and water and pulse just until the dough starts to come together. Turn the dough out into the prepared pan (it will be crumbly), spread evenly and press firmly into the bottom and all the way up the sides to form a crust. Refrigerate until ready to bake.
6. When the vegetables are done, reduce oven temperature to 350°. Bake the crust until set but not browned, about 15 minutes.
7. Place the tart pan on a baking sheet. Spread tapenade over the bottom of the crust. Top with the roasted vegetables. Cut off the top of the garlic and squeeze out the cloves onto the vegetables. Sprinkle with goat cheese.
8. Bake the tart until the edges of the crust are golden brown, about 25 minutes. Let cool for 10 minutes before removing the pan sides and cutting into squares.

Thursday, December 18, 2008

Orange Blossom Ice Cream


This recipe is so simple, quick and easy. It really came into being due to the insane holiday crowds. The grocery store I was at was completely out of cream and I was unwilling to fight the crowds at yet another store. I was therefore faced with a dilemma: forgo the ice cream or make do without cream.

Needless to say I decided to give it a shot with just whole milk, and it in fact turned out great! I made the recipe in a really small quantity, but you can simply double it to produce more ice cream.

It really tastes so amazing, I have to admit I licked the churn bowl of the ice cream machine clean. Don't tell please.

Orange Blossom Ice Cream

1 1/2 cups whole milk
3 egg yolks
1/3 cup sugar
1 teaspoon vanilla extract
1 tablespoon orange blossom water

Heat the milk, vanilla, orange blossom, and half of the sugar in a saucepan. Meanwhile, whisk the yolks and rest of sugar slowly but continuously. Once the milk begins to boil, slowly stream about 3/4 cup into the yolks all the while whisking.

Place the saucepan with the rest of the milk back on the stovetop. Slowly stream the yolk mixture into the saucepan, whisking to incorporate. Switch to a spatula or wooden spoon and continue stirring for about 2-3 minutes or until mixture reaches 185 degrees.

Transfer ice cream base to container and allow to cool in fridge.

Churn ice cream in mixer and enjoy!


Update:
I failed to mention above that the reason I made the ice cream was for Amy's birthday! Happy birthday Amy!!! Those of you that read my blog will remember that Amy was in fact the person who introduced me to orange blossom water and brought me a bottom each of rose water and orange blossom water which I used to make my flavored macaroons.

Sunday, December 14, 2008

Pumpkin Muffins with Maple Glaze


Delicious, moist, adorable, easy and pumpkin!

You don't even need a stand mixer for this recipe, although I did use mine. You can mix all the ingredients by hand, being careful not to over mix once you add the flour at the end. This will ensure light and airy muffins.

Pumpkin Muffins

4 eggs
2 cups sugar
1 1/4 cup vegetable oil
1 can (one pound) pumpkin puree
1 teaspoon vanilla extract
2tsp pumpkin pie spice
2 teaspoons ground cinnamon
1/4 teaspoon ground cloves or allspice
1/4 teaspoon salt
2 teaspoons baking soda
2 teaspoons baking powder
3 cups all-purpose flour

Preheat oven to 350 degrees.

Spray Bundt muffin molds very well with non-stick spray (if you are using regular muffin tins, you may line with muffin cups or spray).

In mixer or bowl, mix the eggs until well blended. Mix in the sugar. Add the oil in a steady stream, mixing all the while, until the batter is thick and smooth.

Mix in the pumpkin, vanilla, spices and salt. Add the baking soda and baking powder. Stir in thoroughly.

Stir in the flour until just blended.

Pour the batter into the molds (about 3/4 full) and bake for 25 to 30 minutes, or until a tester inserted in the center comes out clean. If you are baking muffins in smaller cupcake molds, they will cook quicker, so check them around 15 to 20 minutes.

Invert muffins onto cooling rack and allow to cool.


Maple Glaze

1 cup powdered sugar
1 1/2 tsp pumpkin pie spice
1 teaspoon vanilla extract
2 teaspoons maple extract
1 tablespoon milk or water

Mix all ingredients, adding more powdered sugar to thicken if necessary. Once muffins are completely cooled, spoon glaze over top of each and allow to set.


Sunday, December 7, 2008

Vegan Nog


I love Silk's seasonal soymilks, and my all time favorite is their version of eggnog. Growing up I was the only person in my family who even liked eggnog and now that I can drink it guilt free as both a vegetarian and a health conscious adult (except when it comes to dessert where I accept no impostors), I'm thrilled. In comparison to dairy based eggnog, Silk's version is far healthier.

This evening my mother and I decided to put my version of eggnog to the ultimate test by adding a little bourbon. We weren't sure how it would fare in comparison to the classic version of eggnog, but figured a little bourbon never hurt anybody. The verdict:

Me: "this is amazing"

Mom: "it's so thin"

We both finished our glasses, however, and I for one will make this again. I would strongly suggest this drink to anyone searching for a healthier substitute for a classic eggnog and to those wanting to get the party started by drinking several glasses of nog (this is a more difficult feat with classic eggnog due to it's heaviness and thickness).

My version of nog won't leave you feeling guilty or bloated, but will still afford you a taste of the holidays and a trip down memory lane.

Happy holidays!

Eggless-Nog

8oz Nog Soymilk
1 1/2 oz bourbon, brandy, or rum
dash of nutmeg

Granola Bars

As someone who works the 5am shift at the bakery every day, I take my lunch break around 9 o'clock in the morning. At this point in my day I am starving, but never really in the mood for anything other than a granola bar. I started checking the ingredients more closely on the bars I had been buying, and many use high-fructose corn syrup as well as preservatives. As a vegetarian, I usually go for the granola bar with the most protein and vitamins, but these of course tend to have more preservatives and ingredients I am not familiar with.

I then remembered my first position as a baker.

At my first job, I was responsible for baking all the granola (loose and bars), which was then sold retail, wholesale, and at local farmer's markets. As you can imagine, I baked at least a hundred pounds of granola per week, and more during the holidays.

I decided to start baking my own granola bars for work so that I would know exactly what went into them and could control the amount of sugar used. I wanted a bar that would keep me full throughout the day and provide me with a good amount of protein.

In the following recipe, I used barely any sugar and relied upon honey as the binding agent. I used three types of whole nuts and dried cranberries. To add a little extra flavor, I used orange extract, vanilla extract, and cinnamon.

Another important ingredient I added was wheat germ. Wheat germ not only has more protein and iron than can be found in most meats, it is also is rich with vitamins. It doesn't change the texture or taste of the granola at all, in fact, it blends right in.

Granola Bars

2 cups oats
3/4 cup wheat germ
1 cup whole almonds
1/2 cup pistachios
3/4 cup pepitas

1/3 cup brown sugar
1/2 cup honey
2 teaspoons vanilla
1 tsp orange extract
1 teaspoon cinnamon

8oz dried cranberries

Preheat the oven to 325 degrees. Mix the first 5 ingredients in a bowl and spread out on two sheet pans. Bake for 15 minutes, turning ingredients with a spatula about every 5 minutes so they don't burn.
Meanwhile, bring the next 5 ingredients to a simmer over low heat. Once the nuts and oats are toasted, transfer them to a large bowl and add the dried cranberries. Pour the sauce over and mix well.Line a glass pan (I used a 10"X6" but you can use a larger or smaller depending on the desired size of bar). First spray pan well with non-stick spray, then cut a piece of parchment or wax paper to fit across the pan with two of the sides hanging over (see picture).

Pour granola into pan and spread out with spoon. Using a piece of parchment paper that has been sprayed with non-stick spray, press granola into pan. This step is very important for a "tight" bar. Make sure that the granola is even and well pressed down.Bake for 30 minutes, turning pan halfway through. Allow to cool for at least 2 hours so it has time to fully set.Now comes the more difficult part. To cut the bars, place the granola on a cutting board and use a good bread knife (serrated). I cut my bars into 8 pieces, but you can cut them smaller or larger. If kept in an airtight container, these bars should last for several weeks.

This recipe of course can be adapted to suit your tastes. You can use any type of nut or dried fruit you desire. You can also add some chocolate chips or use different extracts or spices to flavor the bars themselves. Have fun with it and enjoy!

Tuesday, November 25, 2008

Maple Leaf Cookies


I love maple and wanted to create a recipe that incorporates this flavor and celebrates the season. I found these cookie cutters at my mom's house this past weekend and decided to make maple flavored cookies in the shape of maple leaves. I used brown sugar in the recipe to enrich the maple flavor. You can also add a little maple syrup instead of maple extract, although this won't have as intense of a flavor.

I iced the cookies with a simple recipe, flavored with the maple extract. I use a little bit of corn syrup in the icing to ensure the cookies have a nice glossy shine to them. The cookies will stay shiny and beautiful and they taste amazing.

The dough can be made ahead and kept in the fridge or freezer until ready to use.

Maple Leaf Cookies

2 sticks (1 cup) unsalted butter, softened
1 cup brown sugar
1 large egg yolk
1 teaspoon salt
3 cups all-purpose flour
2 tablespoons maple extract
1/4 cup maple syrup (optional)

1. In mixer cream together butter and sugar until light and fluffy.
2. Beat in maple syrup, extract and egg yolk until mixture is well combined.
3. Sift together salt and flour. Mix into dough until just incorporated (do not overmix).
4. Chill dough, wrapped in plastic wrap, until firm, about 2 hours or overnight. Dough may also be made ahead and frozen.

5. Preheat oven to 350°F.
6. Divide dough in half. Keeping one half chilled, lightly flour other half and on a lightly floured surface gently pound with a rolling pin to soften. Roll out dough 1/8 inch thick and with a maple-leaf cookie cutter cut out cookies. Continue with rest of dough.
7.Arrange cookies on baking sheets lined with parchment.
8. Bake at 325 degrees for about 20 minutes until edges begin to brown. Allow to cool completely before decorating.

Maple Icing

1 cup powdered sugar
2 tablespoons milk
2 tablespoons corn syrup
2 tablespoons maple extract

Mix all ingredients adding more corn syrup if too thick. Spread over cookies and allow icing to fully set. Cookies will keep in an airtight container for up to a week.

Monday, November 24, 2008

Pecan Pie


For my pecan pie this year I used Pierre Herme's recipe for sweet tart dough from his book Chocolate Desserts by Pierre Herme. This dough adds a lot of flavor to the pie and offers a cookie-like crust with a buttery crumble to it. I am also planning to use it for my pumpkin pie this Thanksgiving.

To get the best texture in your pie crust, it is important to work the dough as little as possible. This means that when mixing in the flour, you only want to mix until the flour is just blended into the dough. If the dough is still crumbly and dry, pour the mix onto a floured surface and mix it gently by hand to incorporate all the flour.

It is also very important to let the dough "rest" in the fridge for at least 2 hours (best results for 24 hours) before rolling it out. This provides the flour in the dough time to relax and prevents the dough from shrinking in the oven when you bake your pie. See my Saffron Apple Tart entry for tips on how to line a tart shell.

My sister received these adorable mini pie cutters from Crate and Barrel for her birthday this year, and I used them to decorate the top of my pecan pie. Just cut out shapes when you line your tart pan and reserve to decorate the top of the pie before baking.

Sweet Tart Dough
Makes 3 10" Tarts

2 1/2 sticks butter
1 1/2 cups powdered sugar, sifted
1/2 cup almond powder or finely ground almonds
1/2 teaspoon salt
1/2 teaspoon vanilla extract
2 large eggs, room temperature
3 1/2 cups all-purpose flour

1. Mix butter on low speed in standing mixer until very smooth.
2. Add the powdered sugar, almond flour, salt, vanilla and eggs and mix until smooth, do not raise speed.
3. Add the flour and mix until just combined. Place dough on floured surface and finish mixing by hand. Wrap dough and place in fridge for at least 2 hours.
4. Line a 10" tart pan and allow to rest in fridge for at least an hour.

Pecan Pie

Makes 10" Pie

1/4 cup molasses
1/4 cup corn syrup
1 cup sugar
1/2 cup brown sugar

5 eggs

3oz butter, melted

1# pecans

1. Mix first 4 ingredients well, scraping sides of bowl to ensure mixture is well blended.
2. Add eggs and mix well.
3. Add butter and mix.
4. Mix in pecans by hand and pour mixture into prelined tart shell.
5. Decorate with precut pie dough shapes.

5. Bake at 325 degrees for about 50 minutes.

Thursday, November 20, 2008

Acai Mousse Tart with Acai Mirror Glaze

Inspired to create a glittery, shiny, light reflecting dessert for this month's Sugar High Friday, I knew right away I would use some sort of mirror glaze. This month's theme, All That Glitters, allowed me the opportunity to work with a berry I have never personally used before in my desserts and have rarely seen at bakeries around town. It just so happens that this month is also my sister Caroline's birthday and she absolutely loves acai berries.


The acai berry is incredibly nutritious and not only is it the highest antioxidant fruit, the sustainable harvesting of it helps preserve the Amazon rain forest. It is definitely less sweet than your typical berry and has a dark berry/cocoa flavor to it. For this reason, I chose to cut the flavor a bit with some pomegranate and blueberry in my mousse.

You can find acai in juice form and frozen puree form at your grocery store. I used Sambazon puree and juices as well as Bossa Nova juice throughout my recipes. Sambazon offers acai puree, which worked great for creating my mousse. Bossa Nova offered a pure acai juice, which helped to create my mirror glaze.

Since acai is a relatively recently discovered fruit, I could not find any dessert recipes using it. I decided to adapt a couple of recipes and things turned out pretty well.


I started with my pre-baked sweet dough tart crust, then filled it with a white chocolate ganache with crushed pistachios. I then added the acai mousse, inside of which is a orange chiffon cake and topped it all off with an acai mirror glaze.

The flavors paired very nicely and the sweetness of the white chocolate ganache helped since the mousse itself was not actually overly sweet (due to the acai). It seems like a lot of steps to put together, but the whole process can be easily spread over several days (which is in fact what I did).

I first built the mousse and cake layer, then froze it for a day. Then I prebaked the tart shell and filled it with the ganache to set. I then glazed the mousse and set it on top of the ganache to defrost. My sister loved her birthday cake and I hope you will too!


Orange Chiffon Cake
Makes 2 cakes (8" each)

1 # cake flour
2 tsp baking powder
1# sugar
1# 5oz egg yolks
8 fl oz vegetable oil
8 fl oz orange juice
1 Tbs vanilla
1# 5oz egg whites
1 orange, zest

1. Sift the dry ingredients together and mix with 1/3 of sugar.
2. Combine yolks, oil, juice, zest, vanilla in mixer. Add dry ingredients and mix well. Pour into larger bowl and set aside.
3. Whip the whites on medium speed until soft peaks form (you will see white foam). Increase speed and gradually add the remaining sugar. Continue to whip to create a medium peak meringue.
4. Gently fold 1/3 of meringue into yolk mixture to fully combine. Fold in rest of meringue.
5. Divide into two lined cake pans and bake at 375 degrees for about 35 minutes.
6. Allow cakes to cool completely, then cut the top off of one cake.
7. Brush cake with a simple syrup infused with Cointreau (boil 1 cup sugar with 1 cup water then add 1 tablespoon Cointreau)
8. Place in fridge or freezer until ready to use.

*In this tart I only use one of the cakes. You can wrap and freeze the second cake to use at another time.


White Chocolate Ganache with Crushed Pistachios

1/2 cup pistachios, ground
1/2 # white chocolate
1/2 cup cream

1. Bring cream to a boil then pour over chocolate. Stir to fully combine and melt the chocolate.
2. Add pistachios and mix well.
3. Pour into prebaked tart shell and spread evenly. Allow to set in fridge.

Acai Mousse

1/2 cup water
13g gelatin (powder)

3oz sugar
2oz water

500g Acai puree (thawed) *if you can't find puree, you can also use acai juice

10oz cream

1. Whip cream to soft peaks and set aside in fridge.
2. Whisk first measure of water with gelatin and allow to set for about 2 minutes.
3. Bring sugar and water to a boil, then remove from heat. Immediately mix in gelatin.
4. Combine this mixture with acai puree in a large bowl, stirring to combine.
5. Allow mixture to cool completely and just start to set. It is important to stir this mixture constantly so that you don't end up with acai jello. This is made much easier by having an ice bath ready. Have a larger bowl full of ice and water to place the acai mixture bowl inside. Continue to stir.
6. Once mixture has just started to gel, gently fold in the whipped cream.
7. Line the bottom of a 10" springform pan with plastic wrap. Pour 1/2 of acai mousse into bottom.
8. Place prepared cake (brushed with syrup) into center of mousse and press down.
9. Pour remainder of acai mousse on top and place in freezer to set.

Acai Mirror Glaze

10oz Acai juice
1 pkg gelatin

1. Mix ingredients in saucepan over low heat for about 25 seconds to just dissolve the gelatin.
2. Pour on top of frozen mousse (still inside of springform pan). Return to fridge to set.

3. Once mirror glaze has set, remove (still frozen) mousse from springform pan and place on top of tart shell (prefilled with ganache).
4. Allow mousse to fully defrost before serving.


Monday, November 17, 2008

Chocolate Caramel Bars

My sister found an old pile of recipes we had cut out from Bon Appetit magazine and we decided to try this one. We were both drawn to the sea salt flakes on top of the chocolate glaze and were excited to see how it enhanced the flavor of the caramel center.

The full recipe can be found on epicurious. The sea salt on top is essential to this dessert and just a few flakes will alter the dish dramatically. The salt balances the sweetness of the caramel and offers a pleasing complexity to this simple bar.

Thursday, November 13, 2008

Chocolate Lavender Ice Cream

useit

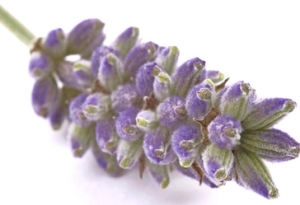
It's probably pretty obvious by now that I adore floral extracts and use them frequently in my desserts. Lavender is a favorite of mine and pairs so perfectly with chocolate that I couldn't resist testing out an ice cream that marries both. When used in moderation, lavender can transform a dish. I will never forget the lavender french fries I ate with Kate at Blue Boheme in Kensington.

I use dried lavender buds to infuse the milk in this ice cream recipe. You should be able to find dried lavender at your grocery store, and I actually found mine amongst the mexican spices section.

The following recipe is very simple. I used 72% Valrhona chocolate in my version, and because of this did not want to dilute the complex flavors of the chocolate with any eggs. Valrhona chocolate is considered to be the best chocolate in the world and it is also the most expensive. However, it is available at Trader Joe's for a very fair price. I believe this recipe works very well and results in an incredibly rich and fulfilling ice cream with a silky mouthfeel.

Chocolate Lavender Ice Cream

3 cups whole milk

1/3 cup sugar

1 Tbs lavender buds, dried

8 oz chocolate

1. Bring the milk, sugar, and lavender to a boil. Turn off the heat and cover tightly with aluminum foil. Allow the lavender to infuse the milk for at least 20 minutes.

2. Bring the milk back to a boil and add the chocolate. Stir to melt.

3. Allow the mixture to cool completely in the fridge before churning in an ice cream maker.

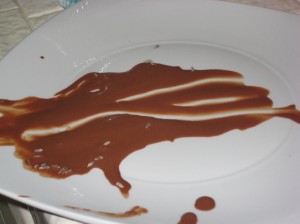
I have to apologize for the lack of pictures. This ice cream was so good that we ate it all before I remembered to take any pictures.
choclavicecream-007

Rose and Orange Blossom Macaroons

Rose Water Macaroon

My adoration of French macaroons began two summers ago while visiting my sister, Lindsay, in Paris. We made a habit of opting out of the breakfast our hostel provided each morning and instead visiting the local patisserie for a pastry or more often than not a pistachio macaroon.
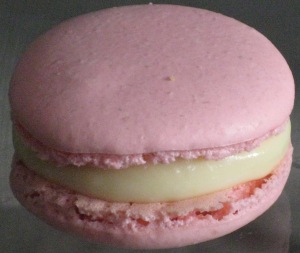
I have yet to find a macaroon in America that compares to those from Paris, although I believe the following recipe comes close. The mark of a good macaroon is a paper thin crust that breaks apart with the slightest touch and encases a soft and dense almond center. If made correctly, you will see a distinct and rough border around the bottom of the macaroon and a smooth dome top. The cookies are usually sandwiched with either jam, pastry cream, or chocolate.

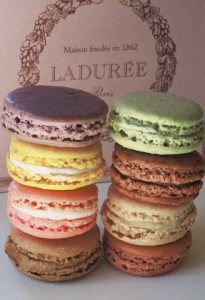
laduree

My sister and I visited Laduree Patisserie on the Champs Elysees and had the opportunity to taste their macaroons. Macaroons come in a variety of colors and flavors and can be very dramatic when displayed.

Macaroons are extremely delicate and are best enjoyed fresh the day they are made, although will last about a day in the fridge. You can freeze macaroons before sandwiching them, although I would only recommend this method if used for decoration.

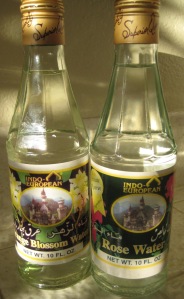
I decided to try to replicate the rose macaroon I had tasted on my trip to Vegas. My friend, Amy, has just given me bottles of rose water and orange blossom water so I decided to test out both these in my recipe today. waters

French Macaroon

1/2# Sugar

1 1/2 oz Water

3 1/2 oz Egg Whites

8 3/4oz Almond Powder

8 3/4oz Powdered Sugar

3 1/2oz Egg Whites

1. Sift the almond powder and powdered sugar together and mix with the first measurement of egg whites. This mixture with be very thick and dry at first, but will come together in a nice paste.

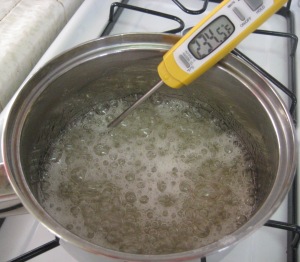
2. In a small pot with a candy thermometer attached to the side, bring the sugar and water to 248 degrees Fahrenheit.

sugarboil2

3. Begin whisking the second measurement of egg whites when the sugar reaches 238 degrees Fahrenheit so that the whites will be at stiff peaks by the time the sugar is at the desired temperature.

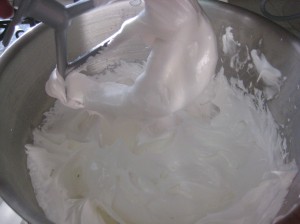
4. Once the sugar reaches 248 degrees, begin slowly pouring into the whites (continuing to whisk in mixer). Continue mixing until the meringue is shiny in appearance.

meringue1

5. Fold the meringue into the almond powder mixture in three stages. The first fold will lighten the paste and decrease deflation of the egg whites with the second and third fold.

6. At this stage I separated my batch into two bowls to add my food color. I dyed the first batch orange (orange blossom) and the second pink (rose water).


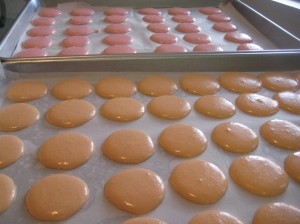
7. Pipe small quarter sized rounds on parchment paper that has been sprayed. It is important that the macaroons are identical in size so that you may later sandwich them. Make sure to leave space between the piped macaroons to allow for spreading.

pipedmacs

8. This next step will ensure that your macaroons have the desired crust and the rough border on the bottom. It is also the easiest step. Allow the piped macaroons to "rest" for at least 30 minutes and up to an hour. Leave them at room temperature during this time.

9. Bake at 300 degrees Fahrenheit for 12 to 15 minutes or until their is a distinct crust on the bottom when turned over. Allow to cool

Pastry Cream

3 1/2 cup milk

3/4 cup sugar

1/4 cup cornstarch

9 egg yolks

6oz butter

2 Tbs Orange Blossom Water

1/2 tsp Orange extract

or

1 1/2 Tbs Rose Water

1. Combine sugar with the milk over heat and bring to a boil.

2. In bowl, whisk together yolks and cornstarch.

3. Once milk comes to a boil, temper egg mixture with heated milk mixture. Pour a small amount of hot milk over yolks while whisking to incorporate. Add more milk and continue to whisk.

4. Bring the rest of milk mixture to a boil, then add the egg mixture, stirring constantly to avoid clumps. Mixture will thicken and begin to bubble when ready.

5. Remove from heat, add butter and stir to combine. Add flavorings.

5. Pour mixture into a bowl and immediately cover with plastic wrap touching the pastry cream. Place in fridge to solidify.

Once the pastry cream has cooled, pipe between two macaroons and sandwich them together. Yum!

orange

Peace, Love and Chocolate: Vosges Haut-Chocolat

Curry powder, balsamic vinegar, wasabi and...chocolate?

Vosges Haut-Chocolat

Vosges Haut-Chocolat Las Vegas is located in Ceasars Palace. This was our first stop upon arriving in town and definitely started the weekend off with a bang. Katrina Markoff started her specialty gourmet chocolate company in 1998 in Chicago. She began traveling the world to discover and blend new diverse spices with chocolate. Her motto is peace, love, and chocolate and her company focuses on being green and donates a percentage of profits to improving conditions for women throughout the world.

Vosges Haut-Chocolat

At her Las Vegas location, we were welcomed into the store with chocolate offerings and unlimited samples of their various truffles and chocolate bars. The salesclerks were helpful and knowledgeable and allowed us to taste freely.

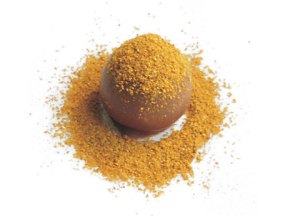
My favorite truffle was the Naga made from sweet Indian curry powder, coconut milk, and milk chocolate. This is actually Katrina's first ever truffle and by far the best. There is just enough spiciness to offset the sweetness of the milk chocolate and coconut milk. The light dusting of the curry powder on top of the truffle adds a brilliant color, which is echoed throughout her collection of truffles.
Vosges Haut-Chocolat

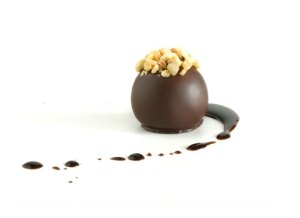
I next tried the Balsamico truffle which was filled with a 12-year-aged balsamic vinegar and topped with hazelnuts. This truffle was enrobed in dark chocolate which paired wonderfully with the tangy vinegar.
Vosges Haut Chocolat

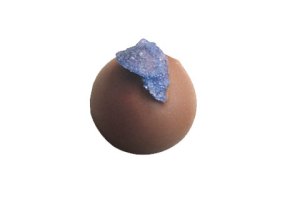
The above Viola is topped with a candied violet flower petal and is beautiful to behold.

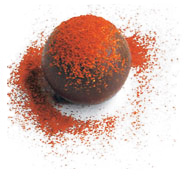
We next tasted the Budapest truffle, which is topped with sweet Hungarian paprika and encased in dark chocolate. Incredibly curious and different.

I tasted a milk chocolate truffle filled with a sweet potato and brown sugar center and enrobed with milk chocolate. This truffle was much too sweet for my tastes.

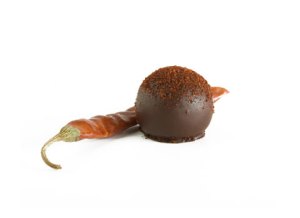
The Red Fire truffle just makes sense. For those of you who enjoy Mexican Mole, this truffle should satisfy you. It is made from Mexican ancho & chipotle chillies with Ceylon cinnamon and dark chocolate.

Vosges Haut-Chocolat

This chocolate shop is an experience to remember and an inspiration. I plan to attempt these flavor pairings in my own kitchen in the near future.

Although I was not able to try their ice cream flavors, I hope to test one in particular very soon. Curry ice cream made from coconut milk! Maybe I will even try a chocolate ice cream infused with ancho chili peppers. Why not?

Vegas Round 2: Francois Payard Patisserie

Francois Payard

Our next stop in Vegas was to visit Francois Payard's Patisserie & Bistro in Ceasar's Palace. Chef Payard offers an assortment of pastries as well as ice creams and chocolates. You can even order freshly made crepes! His patisserie is warm and inviting, dimly lit and whimsical in decor. In the center is a clock tower adorned with chocolate sculptures turning along with the rotation of the clock dials.


Chef Payard's desserts are exciting and visually astounding. Most importantly the ingredients and flavors maintain a perfect balance while still offering some intriguing combinations for the customer.

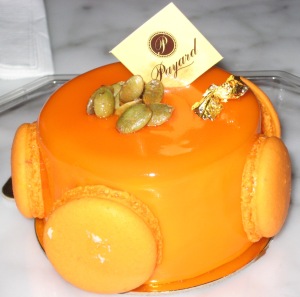
I chose to try the Cendrillon and the Sweet Relief. The Cendrillon consisted of pumpkin mousse, cranberry marmalade, ginger and cinnamon. I couldn't resist this dessert as it was adorned with small orange macaroons! The pumpkin mousse was not overpowering in flavor and quite light in texture. The cranberry marmalade in the center offered a nice burst of flavor to offset the mousse itself.
Francois Payard

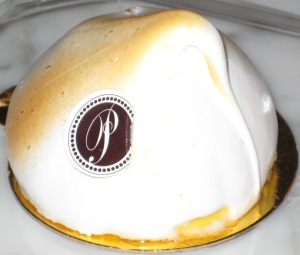
The Sweet Relief was simply decorated, but the construction of the dessert itself intrigued me. I could not figure out how Chef Payard had encased the dessert so perfectly in the swiss meringue. Had he dipped it? Piped it? I had to cut it open to investigate.

This second dessert consisted of a mango mousse with a pinapple souffle. Inside were pieces of roasted pineapple and the entire pastry of course was covered with swiss meringue.

The tropical fruit flavors were a nice change of pace. The pineapple pieces inside the mango mousse added an exciting element of surprise to the dessert. The sweetness of the meringue offset the tartness and acidity of the fruit. Overall this dessert was well balanced and extremely satisfying.

Francois Payard

I recommend enjoying a double espresso at the fountain outside the patisserie after you have tasted your pastries. The espresso here is wonderful.

Every time I see a picture of Chef Payard he is so sincerely happy. It is clear he truly loves what he does and wants you to enjoy it as much as he does. His cookbooks are unpretentious and cater to the homebaker. I recommend his Simply Sensational Desserts.
Francois Payard

Happy Halloween!


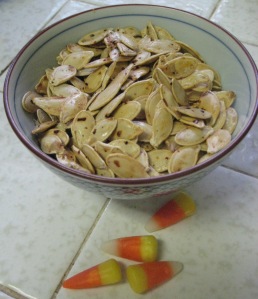
Happy Halloween everyone! Last night I carved pumpkins with some friends and with all the seeds we accrued from 4 large pumpkins I had to try out a few pumpkin seed recipes! I tested 2 savory recipes; one made with red pepper flakes and the other with curry powder. In the end, the seeds tasted the best when mixed in a bowl together so all the seasonings combined. However, I realize not everyone enjoys curry powder and it is most certainly an option in this recipe.

You may also add other seasonings of your choice. I added my favorite Mexican seasoned salt,
Tajin. Tajin can be tricky to find, usually located at specialty food stores, but can also be ordered online. I have actually seen it at Target before as well. This seasoning salt goes with anything from sweet mangos to cucumbers to guacamole to soup.

Spicy Curry Pumpkin Seeds

pumpkin seeds, fresh

olive oil

salt

pepper

red pepper flakes

curry powder

Preheat oven to 275 degrees Fahrenheit. Thoroughly rinse your fresh pumpkin seeds and remove any excess pulp that remains. Dry on a towel then transfer to a bowl. Drizzle seeds with olive oil and sprinkle seasonings on top to taste. Mix seeds with spices then spread out on a baking sheet that has been coated with cooking spray (may also line with aluminum foil then spray). Bake seeds for 1 hour at 275 degrees Fahrenheit turning seeds with spatula every 15 minutes to cook evenly. Cool and enjoy!

What Happened in Vegas...

Jean-Philippe

I decided calories don't count if they are accrued while conducting research.

Only three of the countless pastry shops I visited during my weekend in Vegas stood out from the others as innovative, fresh and inspiring. Jean-Philippe Patisserie at the Bellagio, Francois Payard Patisserie at Ceasar's Palace, and Vosges Haut-Chocolat at Ceasar's Palace.


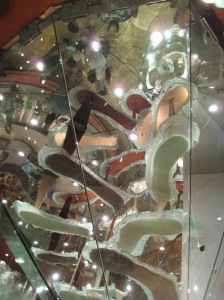
As you walk into Jean-Philippe's Patisserie at the Bellagio you are greeted by a beautiful glass sculpture which also functions as the world's largest chocolate fountain. Chocolate is literally pouring from the ceiling in various forms and hues. If this doesn't catch your eye and draw you in, the bright and vibrant colors from the pastry case should do the trick.

The first pastry I tasted at Jean-Philippe's Patisserie was his Rose Macaroon. This dessert was composed of fresh raspberries and rose infused pastry cream sandwiched between two almond macaroons and topped with a sugared rose petal.

This was by far the best dessert I tasted all weekend and quite possibly the best I have ever tasted.

It was infused with just enough rose to enhance and compliment the tartness of the raspberries and the sweet nuttiness of the macaroon. The macaroon was perfectly baked; a soft and chewy center surrounded by a paper thin crust. The colors and textures of this pastry added to the overall affect and experience when cutting into this wonderful piece of art.


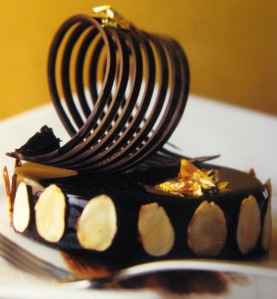
The second dessert I tasted at the Bellagio was Jean-Philippe's Chocobanana. This dessert was composed of a hazelnut crust, chocolate mousse, and caramelized bananas. It was beautifully presented and the flavors and textures worked wonderfully together.

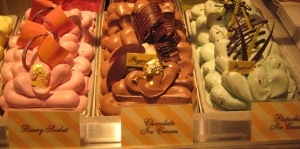
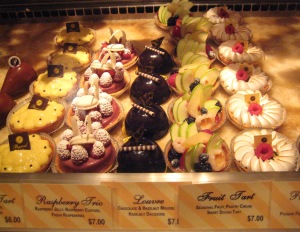
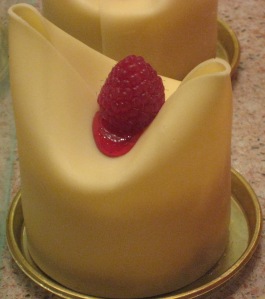
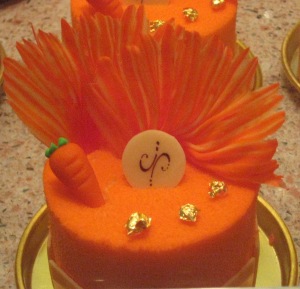
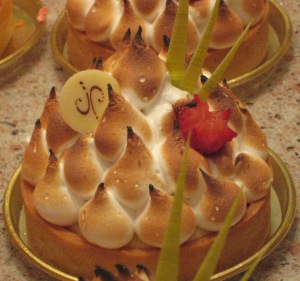
Although I wasn't able to taste another bite, the following pictures are of a few of the other pastries available at the patisserie.
Jean-Phillipe

Jean-Philippe

Jean-Philippe